Home Studio Starter Kit
writer: russell j.t. dyer; posted: jul 2009; revised: apr 2018
After you’ve bought for yourself a kit like the one I’ve described in the article on New Photography Student Kit, you might want to add a bit more. There’s plenty more that you can add to your photography equipment. However, if you just want a little more, we have a few minor items you might include to improve your photos without having to spend much more money.
Equipment Mentioned
table-top tripod;
grey card;
reflectors
FujiFilm X100F;
Manfrotto 345 Tripod; and
Sony RX100 M3
Stability
Although high-end compact digital cameras like the FujiFilm X100F and the Sony RX100 M3 have been engineered to compensate for camera shake, it’s better if the camera isn’t shaking and you don’t use the shake compensation systems. For taking certain types of pictures, it’s better to mount the camera on a tripod.
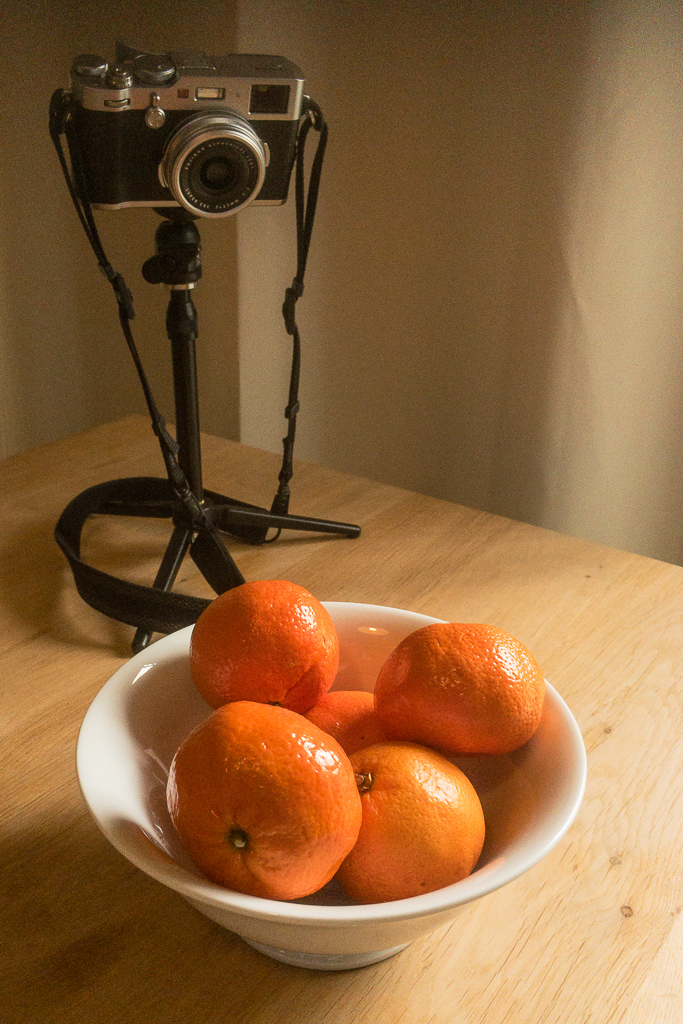
There are much larger tripods than the table top model shown in the image here. However, when you’re traveling, a large tripod is sometimes too much of a burden. A small tripod can fit easily in your camera bag and is not a very heavy addition. Even a small tripod positioned on something, especially at night, can make a huge difference in your photos. There are cheaper ones than this Manfrotto tripod, but it’s strong and sturdy. With all of your equipment, buy good quality gear that you will continue to use it no matter how far you go with your photography.
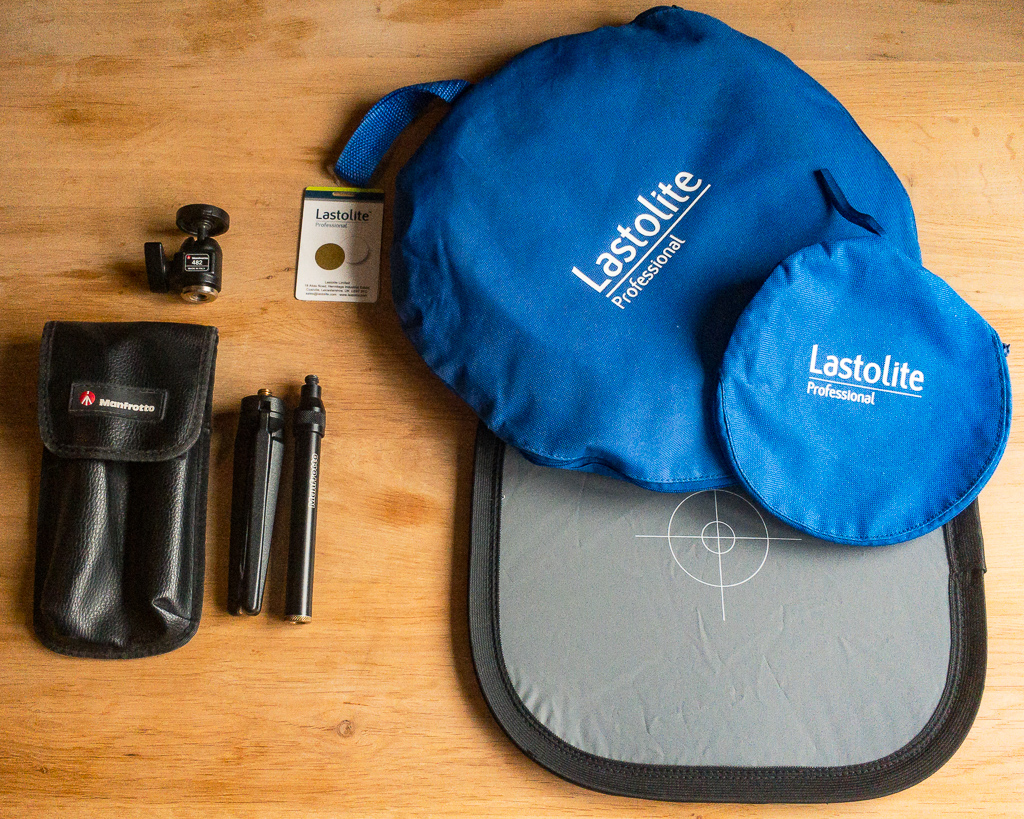
This tripod kit comes with an extension rod to be able to seat the camera another ten inches higher. The large, round black bag contains a 22-inch light reflector: it’s gold on one side and silver on the reverse. The gray square is for manually adjusting the camera’s white balance. The reverse side of it is white and can be used as a small reflector.
The Manfrotto 345 tripod kit has a pivotal ball head that allows for angling in any direction, and a lever to lock it tightly in place. With the extension tube you can raise the camera up another ten inches. Just make sure the legs are positioned properly because it can be top heavy. If so, put something heavier on the base to keep it from tipping over.
Reflectors
Almost all compact digital cameras have a built-in flash. An external flash would be a good addition, but this is a minor kit upgrade. With a good compact digital camera, you can adjust the exposure settings to be able to take pictures in pretty low lighting without the use of a flash — especially if you use a tripod for stability. In fact, the results of taking a photograph without a flash are usually better and have a more natural look to your images.
One simple and inexpensive method to enhance lighting with the existing and natural lighting is to use a reflector. You can have someone hold the reflector at a position and angle to reflect the sunlight onto the shadowy side of the subject you’re photographing. You can also prop the reflector against something near your subject or use a clothes pin to attach it to something like a floor lamp. Use whatever you have handy to fill in the shadows of your shot. The results will be worth the contortions and the low cost of a reflector disc.
Adjusting Color
The light from the sun and light from artificial lights are not exactly pure white. The light from the sun is a little yellow — depending on how far north you are located and the time of year, it’s less yellow. The light from artificial lights can be a little blue. When you look at objects that are white, but are a tad yellow from the sun shing on them, your brain automatically adjust what it sees to compensate for the slight yellowing from the sunlight. This is called, white Balancing. You may not realize that your brain is doing this, but it is.
Digital cameras have an automated white-balance feature that will attempt to make this adjustment. However, sometimes it guesses wrong. So, there are some white-balance presets for various light sources: the sun, incandescent lights, etc., as well as deviations from sunlight (e.g., full sun, shade, cloudy). However, these are general and common settings. What happens when you’re shooting with a light sources that isn’t exactly the color expected by the presets. For instance, how do you set the white balance when in a room with an incandescent light overhead and a sunlight from a nearby window? To know for sure, companies like Seikonic make color meters. However, these are expensive.
A cheap method is to use a gray-card. Better cameras allow you to set manually the white-balance. It’s pretty simple, but varies depending on the camers. You just take a picture of a gray-card placed in front of your subject and tell the camera that this photograph is of a gray card (i.e., of something that is eighteen percent gray). Based on this known color value, the camera adjusts the white-balance, accordingly.
Summary
On the surface this may not seem like much of an upgrade, but for a little bit of money you can take much better pictures and learn more about photography concepts in the process. A Manfrotto table-top tripod costs about between $ 25 and $ 35 US — it’s a little pricey for such a small tripod, but it’s a good one that you won’t toss one day. A reflector, depending on the size, can cost from $ 14 to $ 50 US. A gray-card costs from $ 10 to $ 35 US.
All of these items may seem like a lot to spend. I have two comments in response: first, welcome to photography — it’s expensive if you do it seriously; second, top of the line tripods and reflects cost several hundred dollars and an electronic color meter costs about a thousand dollars — the suggestions I’m making a nominal by comparison.
Again, photographs taken with a tripod can make a big difference in the clarity of your photographs. Using reflectors to fill in light on your subjects, to eliminate shadows can make for more vibrant photos. And photographs that don’t have a sickly blue tone to them because of improper white-balancing, will also make for much better photographs. These few items will have you to start taking studio photographs at home for very little money.