Exif Data for Film within Lightroom
A nice feature about digital cameras is that they record usually the exposure settings and other information about the photography equipment used to take each photograph. A popular convention for recording this information is called, exif metadata. This exif metadata can be useful later if you want to know how a photograph was made. It can be useful in determining what you did wrong (e.g., why part of the subject of the photo out of focus), as well as what you did right. A film camera does not record this information. Given the technology available today, the camera makers could design a camera to do this, to imprint on the negative the exif information. However, the significantly diminished popularity of film cameras makes it unlikely someone will design and manufacture such a film camera. What I do sometimes is write on paper notes of the exposure settings for each photo I take on a roll, or carry a small audio recorder to note this data. Then later, after I get the film developed and the images converted to data files, I use a simple command-line program called, exiftool to change the values of the exif metadata on the image files for each photo. For those who aren’t comfortable working with command-line programs or prefer to do everything in Adobe Lightroom, there are some plug-ins for Lightroom that can help.
Install Plug-In
To install these plug-ins, you may be able to go to the <a href=’http://robcole.smfforfree3.com/index.php/board,2.0.html’>Rob Cole’s forum site</a> and click on the thread labeled, <a href=’http://robcole.smfforfree3.com/index.php/topic,4.0.html’>Download ExifMeta</a>. However, Rob Coles site has been down for quite a while. Therefore, Dave Burns has made the latest version available on GitHub with his account. Go to his <a href=’https://github.com/DaveBurns/ExifMeta’>ExifMeta section</a> and then click on the green button labeled, . Choose to download all of the files and subdirectories in one zipped package.
After you’ve downloaded the zip file and unzipped it — my Mac automatically unzipped it after it was downloaded — there will be a directory called, ExifMeta.lrplugin. You will need to put it in the Lightroom plug-ins directory. On my Macintosh computer’s main hard drive (`Macintosh HD), I went into the directory (i.e., /Library/Application Support/Adobe/Plug-Ins). In case it matters, I’m using Macintosh High Sierra (version 10.13.4 Beta) with Lightroom CC Classic (version 7.1). Copy or move the ExifMeta.lrplugin directory — and all of the subdirectories and files they contain — to that directory.
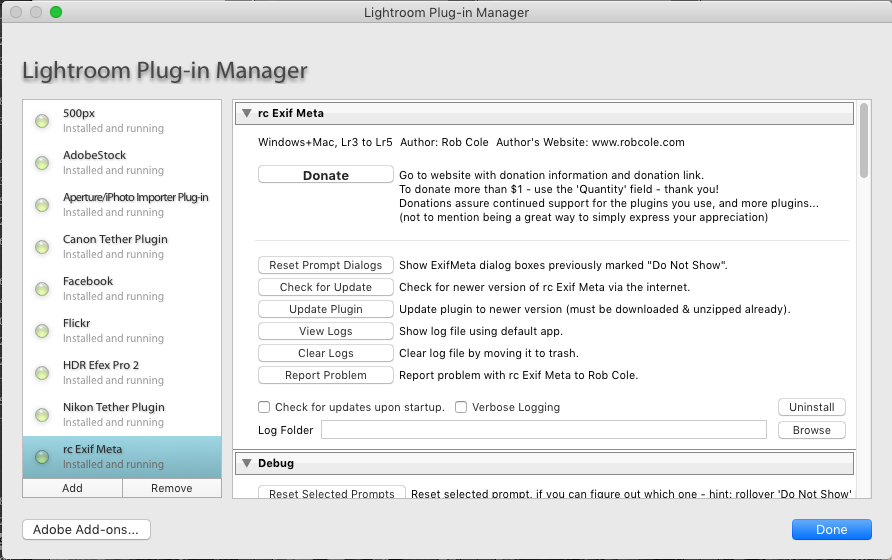
Now go back to Lightroom and click on . A dialog box will appear, the . Click at the bottom left to add the ExifMeta plug-in. When you do this, another dialog box will appear for you to browser your way to the directory where you just copied the plug-in files. When you get there, select the ExifMeta.lrplugin directory — the subdirectories and files under it will be included. You’ll be warned that the plugin is not an official one. Tell it OK to continue. It will then warn you that ExifMeta is not yet configured. That’s fine: you’ll do that in a moment. It will then caution you to remember to commit any changes. This caution will appear many times. So you may want to check the box that reads, and then click . At this point you will see the new plug-in, rc Exif Meta in the list of plugins (see the screenshot).

Adding First Exif Tags
To start, the plug-in is empty of exif tags. It learns them from processing photos. I’m not sure why he doesn’t include them in the plug-in. Maybe because there are so many, he starts with a clean slate so the user can choose what they want to use. To prime the pump, I selected one photo and then clicked on the . That opens a dialog box (see Image 1).
This dialog box starts with no exif data, as you see here. Check the box, Additional Tags and then fill in data like I have it, but to suit your camera and lens. The tag names must be in the <a href=’http://www.sno.phy.queensu.ca/~phil/exiftool/TagNames/EXIF.html’>exiftool standards</a>. So for the lens model, you would use LensModel, with no space between and with the upper and lower case letters as I have it here. The value to which you set the tag can be whatever you want. You might want to be consistent, though, with the values for each picee of equipment. For example, don’t put zeiss ikon for a few photos, Zeiss Ikon for others, ZI for some, and Ikon for some more. That will make searching your Lightroom database later a problem.
Once you’ve finished entering all of the exif tags that you want to change and have entered their respective values, click . It may ask you to confirm and give you some other messages, which you can ignore. Just cooperate with it. The processing will run for a good bit. You will see an indication of its progress and completion in the top left corner of Lightroom. When it’s done it will take you back to the same dialog box. Now click .
The steps above will change the metadata tags you entered in the image file, but not in Lightroom. The forum says to click then on . But that hasn’t worked for me. It’s supposed to update the metadata in Lightroom, without reading the image file for the metadata. What I have to do is click on the menu choice, , then . The problem with that is that it resets all of the modifications (e.g., white balance adjustments) I may have made to the image file in Lightroom. So it’s best to set the exif tags before modifying an image file.
Using the ExifMeta Plug-In
Now that the ExifMeta plug-in has been configured for one image file, let’s see how it works normally — without having to configure the plug-in. Go back to . Select the rc Exif Meta plug-in. Scroll down to the section labeled, ExifMeta Metadata Selection. You should now see several exif tags listed. If not, click on the Refresh button at the bottom of the dialog box. If that doesn’t work, restart Lightroom and try again. Once the pump is primed this first time, though, you won’t have to keep refreshing and restarting each time.
As you can see in the screenshot to the right (i.e., Image 2), I now have some exif tags from which to choose in the ExifMeta Metadata Selection section. The tags that you will see may be different. Here you would click the checkboxes next to the exif tags that you want to appear in Lightroom in the Library module right margin (see Image 3). You can click on one of the buttons above each column to change the sort order here. In this screenshot, it shows the tags that I’ve selected first. When you’ve ticked the tags that you want, then click the Commit button to save your choices. You then have to scroll up to click the Reload button to implement what you have committed in the plug-in to Lightroom.
Close the Plug-In Manager and go back to the photo you modified. Look in the right panel of the Library module, and scroll down until you see MetaData. Click on the choice of Exif to see your changes, to see the exif tags you checked in the plug-in manager (see Image 3). You can also click on RC Standard from the list in the Metadata section to see much more exif tags and information (see Image 4).
When you edit and apply more tags to photos, you’ll get sometimes a message telling you to look in a log to read the error messages. It’s usually just telling you that it found more exif tags. To add them to the tags that are visible in the right panel of the Library module, go back into the Plug-In Manager and put checks by them and save and reload again.
Presets for Cameras and Lenses
When you try to edit the exif tags for another photo or multiple photos (i.e., ), the exif tags and values you entered will still be in the dialog box that appears. You can change those values for a different camera, but it would be better to save those settings for each camera, or each camera and lens combination.
To save your settings, open again, . Look for the section. There will be a pull-down menu that will read initially, Default. Click on it and then choose so that you can create a new set of exif tags to reuse. See the screenshot to the right (i.e., Image 5) to get your bearing:
You’ll notice in the screenshot to the right (i.e., Image 5) that there’s one preset called, Leica M-Mount system. I created that. That’s where we’re heading with what follows. So, click on A small dialog box will appear asking you to enter the name of the preset. I named mine, Leica M-Mount system because I intend to use it for all of my Leica m-mount cameras and lenses. This is a name for a group of presets, not just one, per se. You may name it whatever you want. However, it doesn’t work with certain odd characters (e.g., the ampersand). Once you’ve entered a name for the configuration file, click .
Another dialog box will appear next saying that the preference support file has been created and it wants to know if you want to edit it now. Tell it, Yes. That should open a simple text editor program on your computer so that you may edit the configuration file it created. Using the text editor’s search feature, search for the words Presets, including the double-quotes. That will take you to where you will have to edit the configuration file. Yes, this will seem very complicated at this point. But you’re already through the labyrinth and the treasure is right in front of you now. From here it’s simple, although it looks confusing. Just ignore everything but the following code. It’s all you need to change to get what you want. So look for it.
_t.addlTagPresets = {
    { title = 'One Tag Template', value = {
        { tag='tag', value='value' },
    }},
    { title = 'Two Tag Template', value = {
        { tag='tag', value='value' },
        { tag='tag2', value='value2' },
    }},
There will be a line or two of instructions and a few examples for Nikon. But this is where you need to type. If you’ve been playing with this plug-in already, you probably recognize these templates and probably thought they’re senseless. This is from whence they come. The basic format is a pair of squiggly-brackets to designate a preset. It contains a title and then a value for the preset. Within that preset value, you enter another set of squiggly-brackets that contain pairs of exif tag names and the values you want for them. Be sure to have an opening and closing squiggly-bracket for each tag/value pair (each separated by a comma), and for each preset (title/value pair). A simple way to do this is to edit just these templates or to copy and paste each line or section. You can add as many tag/value pairs as you want to each preset.
On my computer, I edited the two templates provided and added more tag/value pairs. I made one preset for setting the exif tags for images taken with my Zeiss Ikon camera and my Zeiss ZM Biogon f/2 35mm lens, using Kodak Portra 160 film. I made another for when I use the same camera and film with my Leica Elmarit-M 90mm f/2.8 lens. Below is the code I used to replace the above section of code:
_t.addlTagPresets = {
    { title = 'Zeiss Ikon, Biogon 35mm f/2, Kodak Portra 160', value = {
        { tag='Make', value='Zeiss Ikon' },
        { tag='CameraModelName', value='Zeiss Ikon' },
        { tag='Lens', value='Zeiss 35mm f/2.0 T* ZM Biogon' },
        { tag='LensModel', value='Zeiss 35mm f/2.0 T* ZM Biogon' },
        { tag='Focal', value='35' },
        { tag='ISOSpeedRating', value='160' },
    }},
    { title = 'Zeiss Ikon, Leica Elmarit-M 90mm f/2.8, Kodak Portra 160', value = {
        { tag='Make', value='Zeiss Ikon' },
        { tag='CameraModelName', value='Zeiss Ikon' },
        { tag='Lens', value='Elmarit-M 90mm f/2.8' },
        { tag='LensModel', value='Elmarit-M 90mm f/2.8' },
        { tag='Focal', value='90' },
        { tag='ISOSpeedRating', value='160' },
    }},
}
When you’re finished, be sure to save the configuration file in your text editor. On my computer, I can do . Then close the configuration file. The Plug-In Manager should still be open. You’ll have some messages trying to help you through the process. Read them if you want, but then close them. Go back to the Preset Manager section and select the preset group you created. In my case, that’s Leica M-Mount system. You will now need to reload the plug-in. Click on the Reload Plug-in button to do that. When that’s done, close the Plug-In Manager by clicking on .
Now you can use the presets that you created. Select an image file to try them. From the menus, click on . If it’s not already set, check the box for . Then click on the list of choices and look for the presets you’ve created. In the screenshot to the right (i.e., Image 6) taken on my computer, you can see I have now two choices: both have tags for a Zeiss Ikon camera and Kodak Portra 160 film, but one with the Zeiss 35mm lens and another with the Leica 90mm lens.
Once you click on the preset for the camera and lens combination that you want, that you used for taking the photos, it then loads the preset exif tags and values from the configuration file. Then click on to apply these tags and values. You can change them on the fly here if you want and it won’t change the settings in your configuration file. It will only apply adjustments made here to the image files for which you’re applying the tags and their values. By creating presets for the exif tags you would like to change for all of your image files made from film, you can quickly apply them to the entire roll of film in seconds. It’s just an effort to create a configuration file the first time. The hardest part is figuring out how to configure the plug-in. I’ve now done that. That part now will be easier for you.
If you want to edit the configuration file later, you can go back through the , or you can use a text editor to edit it, directly. On my Macintosh system, the configuration file is located at /Applications/Adobe Photoshop Lightroom 4.app/Contents/PlugIns/ExifMeta.lrplugin/Preferences/Leica M-Mount system.txt. Don’t edit it with a word processor program like, MS Word. That will add binary characters to it and probably stop it from working. After you make changes to the configuration file and save it, you’ll still have to reload the plug-in. If Lightroom is not running, then when you start it, the plug-in will reload automatically.